At Blankly, we pride ourselves not just for the product that we are building, but also towards cultivating a community of quant enthusiasts which no one else is doing in this field right now. We identified a critical void that many Discord servers currently suffer from: low member engagement. That said, to elevate the overall experience of using the Blankly package and fix the problem identified earlier, we decided to roll out three Discord bots each of which specializes in something unique. We will dive into the Blankly Connect Bot in this article.
Using Blankly Connect to Integrate a Discord Bot
To give the users a taste of our product, we created this bot using a virtual sandbox and our in-house Blankly Connect API—the single source to connect, unify, and trade across all exchanges—which aims at simulating what the actual product will be like. We feel that this is the best way for beginners to get acclimated with the fast-paced environment of quant trading and for more experienced members to understand how our platform works.
Having used Discord previously as a means to connect with friends, group partners, and other communities, I was very excited to create a bot that focuses on community trading ultimately helping server owners spice their servers and elevate their member's experience to a new level. At Blankly, for example, it gave us the opportunity to differentiate ourselves from other similar platforms by offering our members something they haven't ever witnessed.
I would highly recommend that you install some kind of an IDE (I used VSCode, however my team prefers Webstorm :/), Node.js, and set up a Discord account. Before you even start coding, you are going to need to create an application from the Discord Developer Portal which will allow you to obtain an authorization token and set the permissions for your bot.
Once the application is created, click on the section titled Bot and go ahead and fill the necessary details. Find the bot's authorization token and make sure to not share it with anyone. This token will be needed in the next few steps. Now that your bot is setup, you have to invite it to your server. Therefore, select the OAUTH2 tab and then the URL Generator to allow you to select certain permissions and abilities for the bot. When done, copy the URL shown at the bottom of the page and paste it into your web browser. Select the server to which the bot will be in and that's it. Your bot is alive within your server... YAYY 🎆
Now, create a file on your IDE which will contain your bot's token like the following snippet below and make sure to give it a .json file type before adding it to .gitignore, so that the token wont be visible when you push your repository onto Github.
{
    "token" = "[token goes here]"
}
The second starter file will be the package.json so that it is easy for others to manage and install your package. Add the following fields:
{
    "name": "[Name of your bot]",
    "version": "[version id]",
    "description": "Enter a description",
    "main": "bot.js",
    "author": "Your Name Goes Here",
    "dependencies": { },
    "scripts": { }
}
The last file needed is where you will code how your bot should function and its behavioristics.
let Discord = require('discord.io');
let auth = require('./botAuth.json');
let blankly_connecter = require('../src/blankly_client')

blankly_connecter.setExchange('coinbase_pro');
blankly_connecter.setKeys({'API_KEY': '***', 'API_SECRET': '***',
'API_PASS':'***'});
blankly_connecter.setSandbox(true);

let bot = new Discord.Client({
    token: auth.token,
    autorun: true
});

bot.on('ready', function (evt) {
    console.log('{Status: Connect Bot is Connected}')
});

bot.on('error', function (error) {
    console.log(error)
});

bot.on('message', function (user, userID, channelID, message, evt) {
    if (message.substring(0, 1) == '!') {
        var args = message.substring(1).split(' ');
        var cmd = args[0];
        args = args.splice(1);
        switch(cmd) {
            case 'ping':
                bot.sendMessage({
                    to: channelID,
                    message: 'pong!'
                });
            break;
            // Add further cases if you need to..
        }
    }
});
This is the basic boilerplate code for a Discord bot which responds to commands. This code snippet is more than enough to help you understand how Discord bots operate and the syntax required to be able to operate them. Another great resource I would recommend are the documentation notes for the Discord bots such as Discord.io, which this bot uses, but you can also use Discord.js. It is also important to emphasize that there are many other ways that you can code your bot depending on your needs.
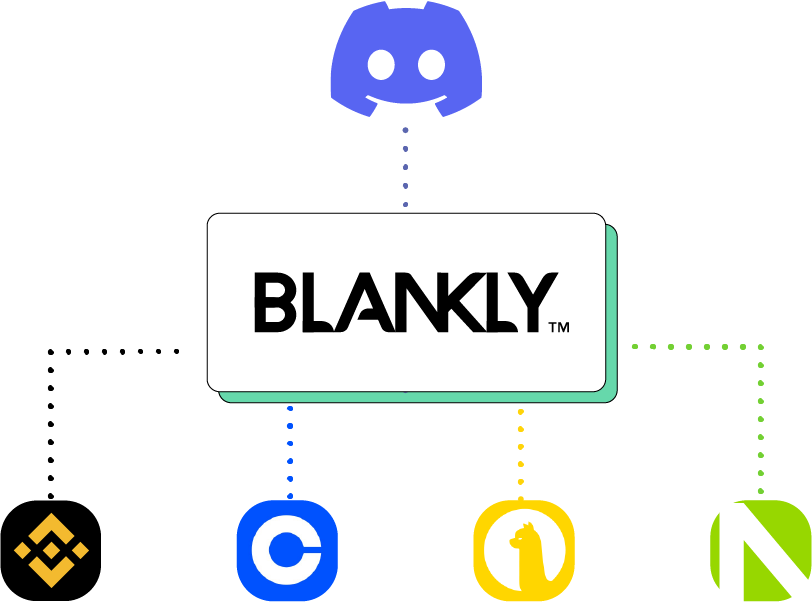
Furthermore, as you can see, I imported the Blankly Connect API in bot.js so that I can utilize its robust functionality. As shown from the diagram below, this API acts as a middleman between Discord and the major stock and cryptocurrency exchanges allowing for a smooth experience for the user when inputting commands.

You now have the basic tools needed to create your own community-based trading Discord bot. Have fun coding and I hope your bots don't take over the world
Overall, this was a very interesting project as it exposed me to a new aspect of Discord which I was previously not aware of—the Developer side. Due to the pandemic, I have started using Discord almost every day and never really thought how easy it would be to create a bot to handle certain tasks. Although at first it may seem a bit daunting, it gets easier and easier as you become more comfortable with the developer environment. I can now confidently go ahead and create a bot within hours. Incorporating bots to your server will definitely increase the overall user engagement and will also significantly boost the number of users in the server and, thus, is a great addition to have.
As we look to continuously improve the bots, our next few steps are to transform this project into being open source, similar to our other products, so that the community can have a more direct involvement with our cause and we can make improvements related to your feedback.
